Fieldcraft Techniques for a Cadet
INTRODUCTION INTO FIELDCRAFT
The principal skill to be successful at escape and evasion is to be expert at applying fieldcraft in any given situation. It is a subject most enjoyed as it is usually fun and gets you and your `mates' to turn out in strength, especially if it says on the programme that it's going to be an escape and evasion exercise if it's at night - so much the better.
We are not suggesting that all cadets still like playing `cowboys and Indians', but perhaps fieldcraft could be described as organised cowboys and Indians!
If you live in a city/town you are at some disadvantage to see fieldcraft in action, however, if you are able to get into the countryside or live in or near it, you will be aware that the wildlife `get a living' off the land by being experts in the use of their skills of; stealth, patience, speed and fitness, stamina, planning and cunning and being natural experts at camouflage and concealment.
NATURAL SKILLS FOR CADETS
Fieldcraft is their prime skill in catching their food and in many ways to be good at fieldcraft you could do no better than to study wildlife at every opportunity.
Observe how a cat stalks its quarry, how the sparrow hawk, hovers patiently, observing the right moment to drop in on the field mouse, how the fox who uses the hedgerows to move from one field to another, see how well a rabbit is camouflage against the ground, all of these examples are types of individual fieldcraft skills exercised for the purpose of either defence or attack.
In your case, having knowledge of fieldcraft brings together and practices some of the skills required to evade capture or to act effectively as a sentry.
INDIVIDUAL SKILLS
Once you have an understanding of the need to imitate those skills that wildlife practice to survive in the field, then you will be on the way to attaining an acceptable standard of individual fieldcraft.
Even when you are mentally and physically fit, you will need a lot of practice and patience, to develop the natural ability to react in defence of your survival, both as an individual and as a member of a group. Be good at fieldcraft and survive - you seldom get a second chance.
METHOD OF JUDGING DISTANCE
WHY JUDGE DISTANCE;
If you can judge distance you will know the approximate area in which to look when given an order. If your sights are not correctly adjusted on the range, your shots will probably miss the target.
USE A UNIT OF MEASURE
100 metres is a good unit, the range is marked out at 100-metre intervals. A full-size football pitch is about 100 metres long.
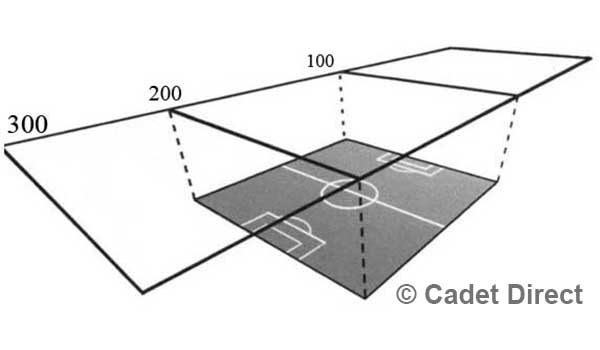
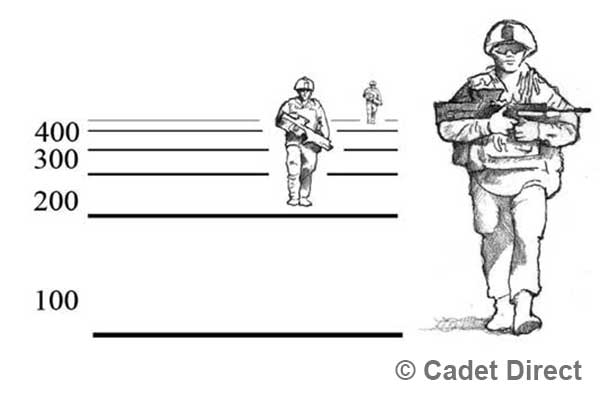
DO NOT USE THE UNIT OF MEASURE METHOD OVER 400 METRES IF YOU CAN'T SEE ALL THE GROUND BETWEEN YOU AND THE TARGET AREA/LOCATION
USE COMMON OBJECTS FOR APPEARANCE METHOD
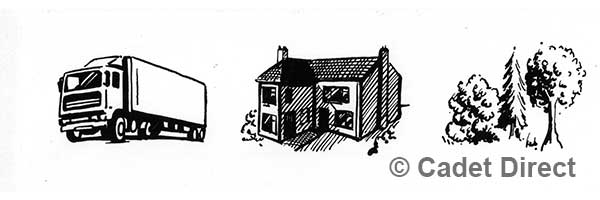
AIDS TO JUDGING DISTANCE
When you know what 100 metres looks like, practice fitting your Unit of measure between you and a target.
APPEARANCE METHOD
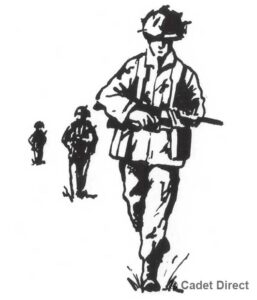
By noting what a person looks like at a set distance, you can then use the appearance method. Common objects may also be used for this method.
THINGS SEEM CLOSER
FURTHER AWAY
REMEMBER
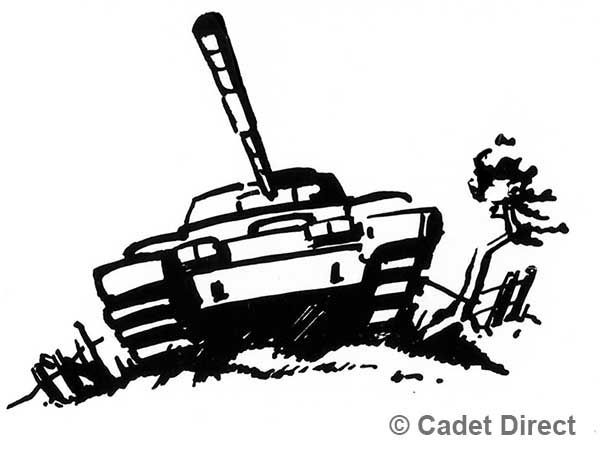
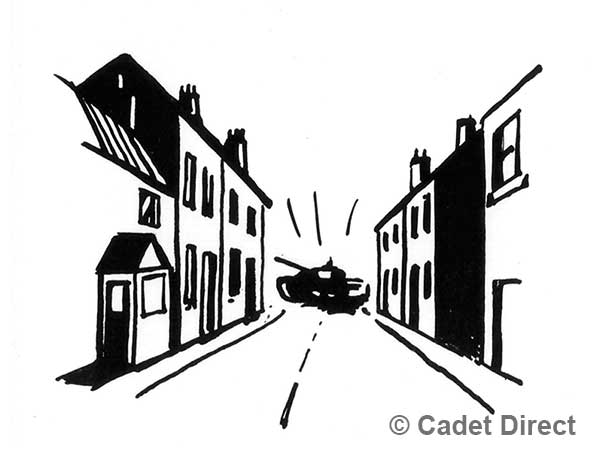
Things seem closer ... In bright light, if they are bigger than their surroundings if there is dead ground between you and them if they are higher up than you.
Further away ... With sun in your eyes, in bad light. When smaller than surroundings. Looking across a valley, down a street or along a path in a wood, if you are lying down.
KEY RANGES
If the range to one object is known, estimate the distance from it to the target.
BRACKETING
Calculate mid-distance between the nearest possible and furthest possible distance of a target.
Nearest - 100
Farthest - 300
Mid-distance - 200
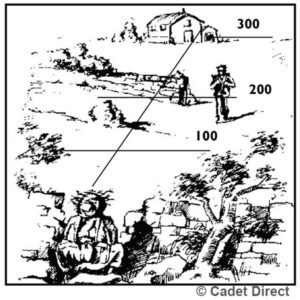
HALVING
Estimate the distance halfway to the target then double it:
100 x 2 = 200
PERSONAL CAMOUFLAGE AND CONCEALMENT
The enemy is looking for you so - don’t make it easy.
Make sure you merge with your surroundings
Too Much Just Right Too Little
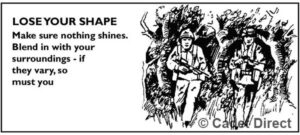
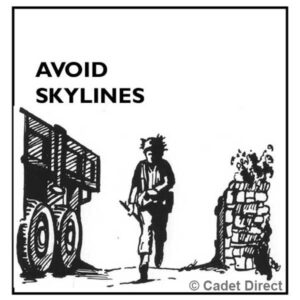
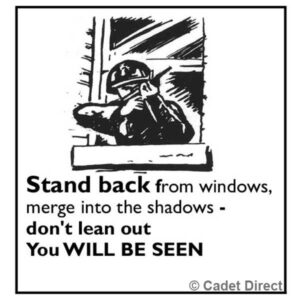
Don't use isolated cover - it stands out
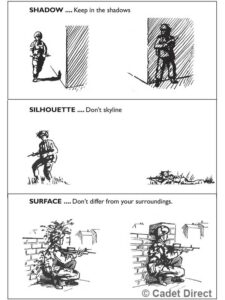
SOMETHING IS SEEN BECAUSE OF ITS:
IS FAMILIAR OR STANDS OUT
- Shape
- Shadow
- Silhouette
IS DIFFERENT FROM ITS SURROUNDINGS
- Surface
- Spacing
- Movement
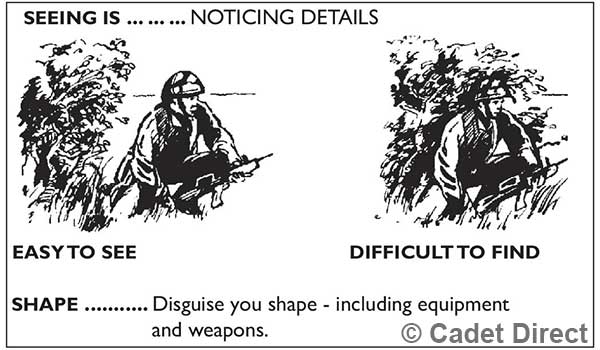
SPACING ... ... Keep spread out - but not equally spaced.
MOVEMENT ... ... Move carefully - slowly when concealed - sudden movement will attract attention.
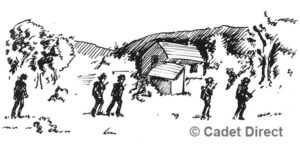
Look through cover - if possible - not round it. You MUST SEE without being SEEN.
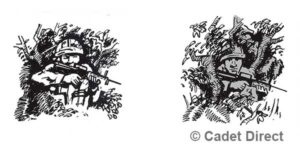
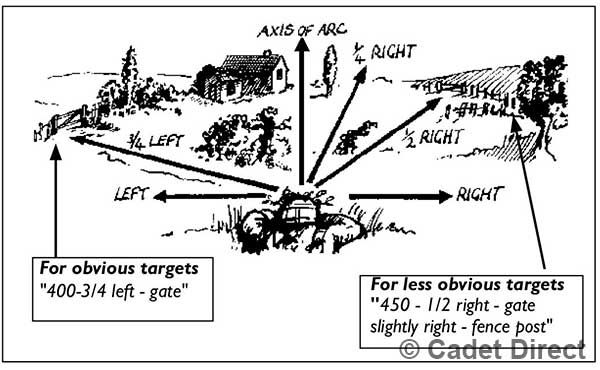
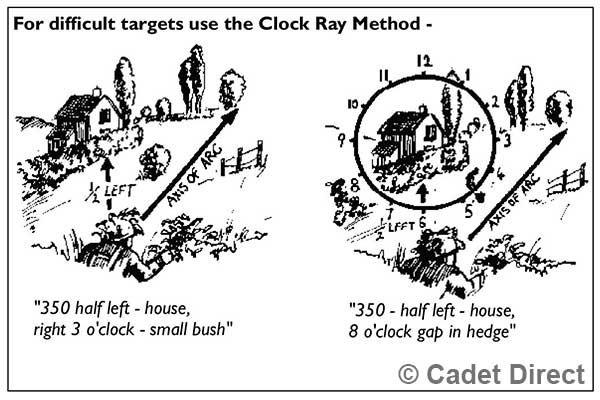
TARGET RECOGNITION
The correct target must be located and fired at.
MOVE QUIETLY AT ALL TIMES
Keep your weapons out of the mud.
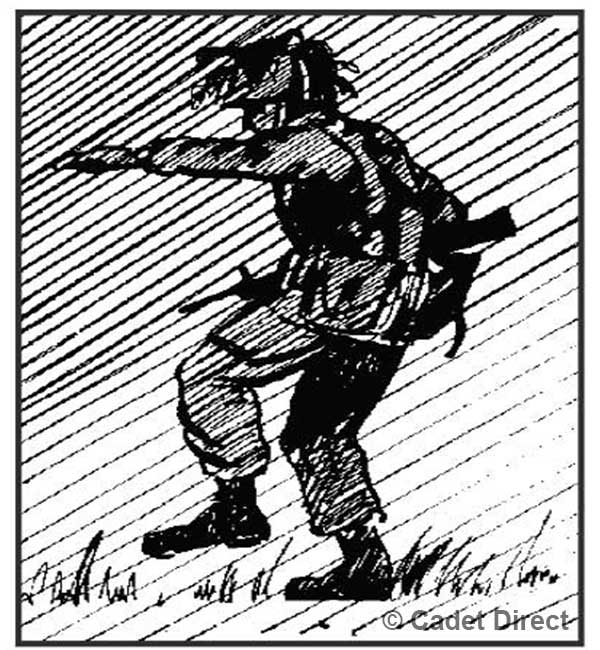
MOVEMENT AT NIGHT
Movements used during daylight are not suitable at night-they have to be adapted.
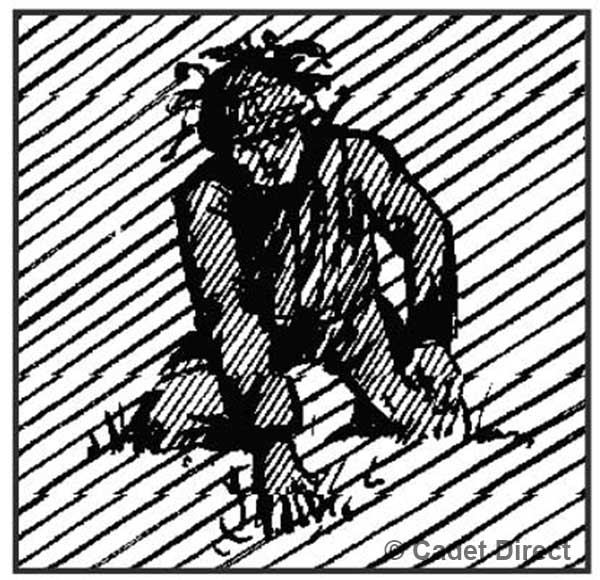
THE GHOST WALK
Lift legs high, sweeping them slowly outwards. Feel gently with toes for a safe place for each foot, put the weight down gently.; Keep knees bent. Use the left hand to feel the air in front of you from a head height down to the ground checking for obstructions, trip wires, booby traps or alarms etc.
THE CATWALK
Crawl on hands and knees. Search ground ahead for twigs move knee to where the hand has searched.
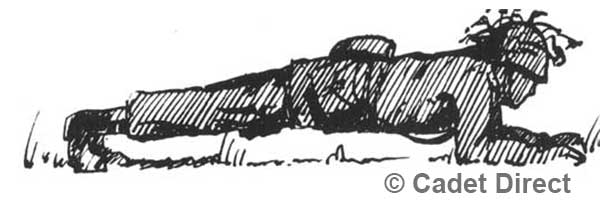
THE KITTEN CRAWL
It is quiet- but slow. It is very tiring. Lie on your front, search ahead for twigs, move them to one side. Lift your body on your forearms and toes, press forward and lower yourself on to the ground.
NIGHT NOISES
At night you hear more than you see. Stop and listen. Keep close to the ground, turn your head slowly and use a cupped hand behind the ear. Freeze if you hear a noise.
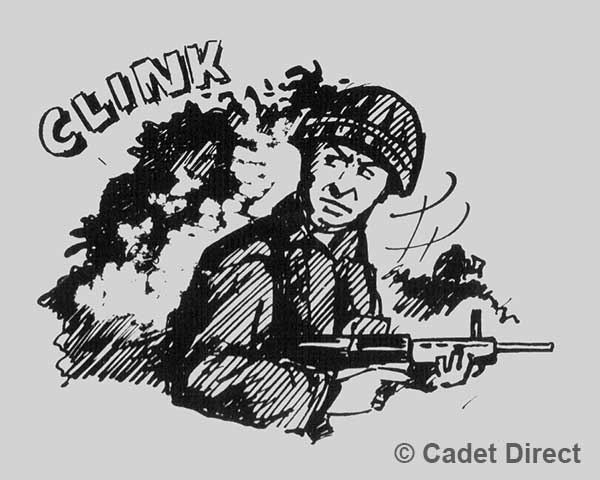
MOVING AT NIGHT - REMEMBER
Keep quiet .... have no loose equipment. Move carefully ... use the Ghost walk, Catwalk or Kitten crawl. Clear your route by hand, search carefully in front of you ... dry vegetation will make a noise. Use available cover ... flares, thermal imaging and night observation devices will turn night into day. Keep to the low ground ... you split your party at night at your peril.
LISTENING AT NIGHT
If the enemy is about - keep an ear close to the ground. The closer you are to the ground, the more chance you have of seeing the enemy on ‘skyline’. Keep your mouth open this opens your ear canal and aids your hearing.
NIGHT VISION
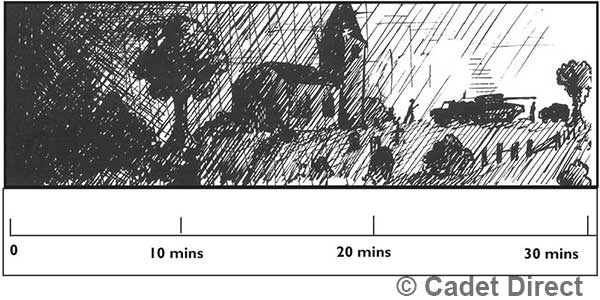
We can see in the dark - but REMEMBER our eyes take 30 minutes to get used to the dark. We see less than in daylight. We see shapes - not detail. We see skylines and silhouettes. We may see movement.
YOUR EYESIGHT
Your eyes have two sets of cells, one set for daylight (CONES) in the centre of your eyes, the other set for darkness (RODS), which are around the CONES.
The night cells work when the day cells are affected by falling darkness. With constant practice, night observation can be improved. If you have a cold, headache or are tired it can reduce your night vision.
You will find that there is a limit to the time you can concentrate effectively on any given point or your vision becomes blurred.
Most service units use thermal imaging (night sights) that "turn darkness into daylight" in as much that they pick out an object giving out heat (body heat).
The SUSAT sights on the SA80 MK2 Rifle (an optical sight) has advantages similar to that of binoculars for night observation.
BRIGHT LIGHT RUINS YOUR NIGHT VISION
If caught in the light of flares take cover at once in open ground.
If in a wood - FREEZE. If you see a flare, quickly close one eye to protect your night vision, use the other eye to look about you taking advantage of the light, but do not move suddenly as this will give you away.
DUTIES OF A SENTRY
Sentries are the eyes and ears of the squadron. If they do their job well, their squadron will be safe and secure.
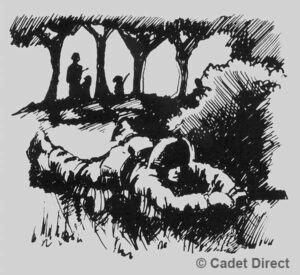
When you are a Sentry make sure that:
You know and understand your orders. That you know what to do if your post is approached by a person or vehicle.
You ask questions if you do not understand anything.
What ground to watch. The direction of the enemy.
Signal for defensive fire. Names of prominent landmarks. Where neighbouring posts are situated.
Information about patrols that may be in the area, or coming through your post.
SENTRIES AT NIGHT IN THE FIELD
At night sentries work in pairs.
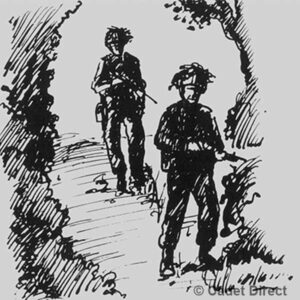
Sentries must know:
1. What to do if anyone approaches their post.
2. What ground to watch.
3. The Password.
4. Sentries close to the enemy must know :
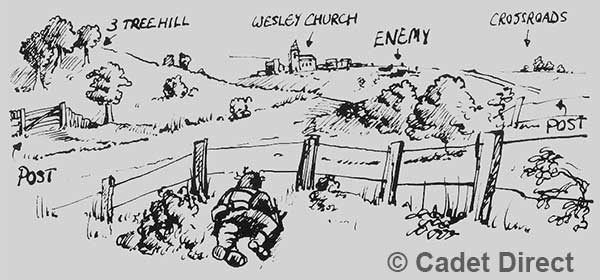
The direction of the enemy.
Name of landmarks.
Where neighbouring posts are.
Signal for defensive fire.
About patrols that may come in or out through their post or near them.
HOW TO CHALLENGE.
When you see movements which you think may not be your own forces - alert your Patrol Commander.
Say ‘HALT’ HANDS UP. ‘Advance one and be recognised’. 'Halt'. Give the challenge half of the password - quietly, so that only the first man can hear it.
ACTION -
Allow friendly forces through, know how many and count them through - one at a time.
The section opens fire at enemy troops.
NOTE
Be aware of a common trick which is for the enemy to approach a sentry, listen and learn the first half of a PASSWORD then fade away.
An inexperienced sentry may allow this to happen. The same enemy then approaches another sentry and challenges them before they can challenge them.
Again the inexperienced sentry might then give the reply then allow the enemy into their position. So be careful and never allow anyone into your position unless you can positively identify them, when in doubt call for help.
USE YOUR SENSES
What are your senses, how can they help in fieldcraft? On a patrol or on duty as a sentry, you will use your EYES and EARS, and your TOUCH when feeling your way through woods or difficult cover.
Your sense of TASTE may not be used, but your sense of SMELL — depending upon the SMELL — may remind you of taste. SMELL can give you away and the enemy. Body smell or the smell of cooking, or anything else drifts on the air and can give away your position.
CHOOSING A ROUTE
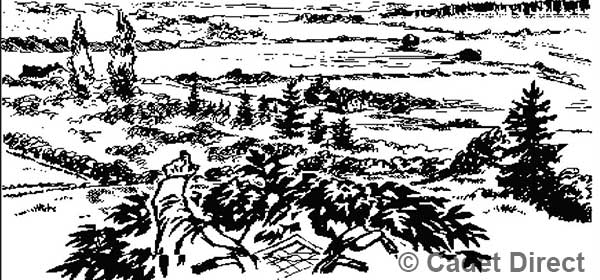
If you have to advance across the country, check that you know where to make for. Then decide on the best route.
REMEMBER
Routes must be planned ahead. You must move in bounds or stages from one observation point to another. You must check your direction - are you keeping on course.
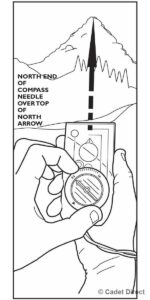
ALWAYS USE A COMPASS
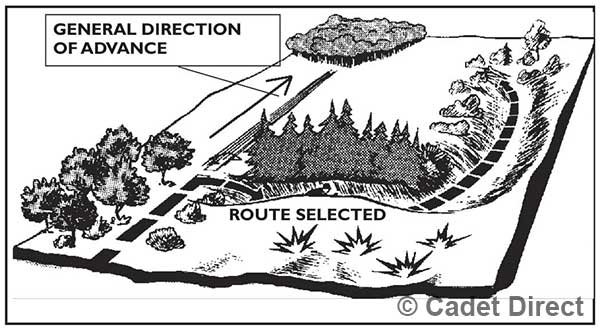
Must not be seen but should be able to observe without restriction. If you have to take a risk to choose a route which offers the risks early in your approach rather than later on since you will have less chance of being seen.
The best route will - have places to observe the area - without being seen yourself.
Don’t go blindly on towards and into an unknown area.
Give good positions and cover for sentries.
You must be able to take offensive action if necessary.
Let you move without being seen.
Not to have impassable obstacles such as marshland or open ground or ravines.
PACING
Pacing is necessary because you must always know how exactly far you have gone when counting a number of your own ‘paces’.
You should know your ‘Pacing Scale’, over different types of ground conditions, I.E. Tarmac roads or tracks, grassland, woodlands etc.
To find your PACING SCALE, put two markers out 100m apart. Walk the distance between them as you would on a patrol, counting the paces as you go.
If it has taken you 120 paces to cover the 100m, then that is your PACING SCALE. It follows, to use this scale if you were on a patrol and had to go a distance of 300m, you would have to count out 360 paces.
Under some conditions you can use a specific length of string, tying knots at every 120 paces. Having used the length of string, un-tie the knots and repeat the process on the next ‘leg’ of your route.
It is always advisable to have a CHECK PACER, remembering to check that your PACING SCALE is the same by day and night.
NAVIGATION
This is the art of moving from one place to another and consists of three important stages that MUST be carried out if you are to be successful, they are as follows:
1. PLANNING
2. KEEPING DIRECTION
3. GOOD PACING
PLANNING -You must plan your route in advance, using maps, air photos, sketches and information from previous patrols or recces.
KEEPING DIRECTION - Always take several compasses and as many ‘pacers’. Always get someone else to check your navigation, at both the planning stage and while you are executing the movement. It is often hard to keep direction, especially at night, in fog or in close country.
When it is necessary to make a detour to avoid an obstacle or seek cover, it is easy for leaders to miss the correct lines of advance.
AIDS TO KEEPING DIRECTION.
Some of the aids to keeping direction are:
a. The compass, map and air photographs.
b. A rough sketch copied from a map or air photograph.
c. Keeping two prominent objects in view.
d. Using a series of easily recognisable landmarks, each visible from the previous one.
e. The stars and also the sun and moon if their natural movement in the sky is understood.
f. Memorizing the route from a map or air photograph. Helpful details are the direction of streams, distances between recognisable features coupled with pacing, and the course of contours.
g. Trees in the exposed country tend to grow away from the direction of the prevailing wind. Moss may grow on the leeward side of tree trunks.
h. Remembering the back view, patrols and others who may have to find their way back should look behind them from time to time and pick up landmarks to remember for the return journey.
j. Leaving directions marks on the outward journey, these may be pegs, small heaps of stones.
k. If the route is being walked by day by those who are to guide along with it by night, they must take note of skylines and objects or features which they will be able to recognize in the dark.
SELECTING OF LINES OF ADVANCE.
Remember the keyword - ‘G R O U N D’
G - Ground from the map. The type of ground; Open/close country, rolling/flat.
R - Ridges, watercourses and watersheds (highest) mark on map or talc.
O - Observation – good viewpoints.
U - Undergrowth - study woods, scrub, trees, villages.
N - Non-passable obstacles, such as rivers, ravines, marshland.
D - Defilade covered lines of advance and areas which offer cover can now be selected.
OBSERVATION — SEARCHING GROUND
The skill of searching ground is based upon learning to `scan' an area using an accepted system.
It will test your concentration and exercise your knowledge of `why things are seen' and the principles of camouflage and concealment.
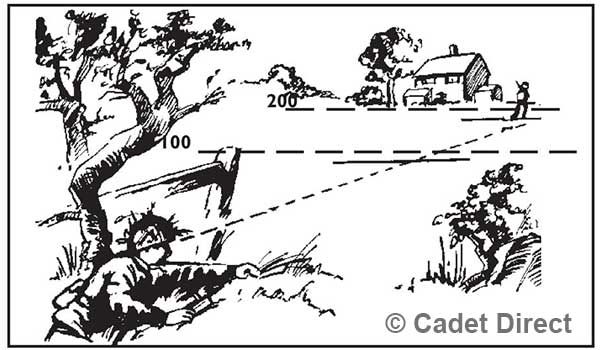
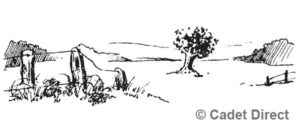
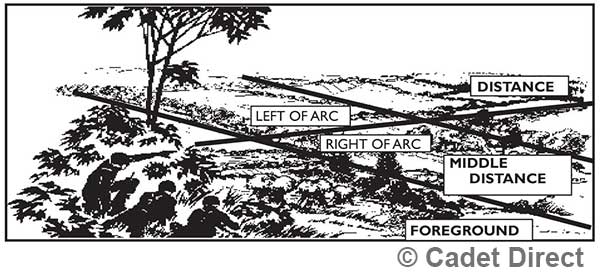
In the diagram we have - for the purpose of illustrating to you — drawn lines across the landscape.
In practice, you would choose prominent features, landmarks, roads etc., and draw your imaginary lines across the landscape through these reference points.
SCANNING
As seen in the illustration on the previous page, the landscape is divided into FOREGROUND, MIDDLE DISTANCE and DISTANCE.
You can further divide this by indicating a centre line (again based on reference points), calling left of the line "LEFT OF ARC", and right of the line "RIGHT OF ARC" as shown in the illustration.
Having divided the landscape, the correct method is to scan each area horizontally (left to right or right to left).
View the area in short overlapping movements in a very precise manner, especially any features that are at an angle from your position.
SEARCHING
While scanning you may see something move or that requires further investigation. There may be an area where you may come under observation from, it would be as well to check that out early.
Weather conditions can give you a clue when searching, frost on bushes, footmarks will show up clearly, if the weather is hot camouflaged positions can be given away when leaves or grass dry off changing colour.
Search across hedges and rows of trees, NOT along them. At all times consider WHY THINGS ARE SEEN.
PYROTECHNICS — BLANK AMMUNITION & THUNDER FLASHES, FLARES AND SMOKE.
As an Air Cadet, you may be involved in exercises with the RAF Regiment or other Cadet Forces (including the CCF) where blank ammunition, thunder flashes, flares and smoke generators are used.
You must be made aware of the safety standards required when taking part in training where pyrotechnics are to be used.
All pyrotechnics by their very nature contain explosive materials.
Without exception, they are all very dangerous, especially if used in a confined space or explode within a few feet of you.
Loss of sight and hearing, badly burned hands and faces are serious injuries sustained by individuals from pyrotechnics.
You will be told when pyrotechnics are in use and instructed as to the correct safety precautions to be observed by all ranks taking part in the exercise.

